Clothes that almost fit are the most frustrating kind. The shirt sits perfectly on your shoulders but billows at the waist. The pants hug your hips but pool at the ankles. The good news? You don't need to return them or let them collect dust. Learning how to adjust clothes gives you the power to transform any ill-fitting garment into something that looks custom-made. Whether you own a sewing machine or have never threaded a needle, this guide walks you through every technique, from simple no-sew hacks to professional-level tailoring tips.
At a Glance
Adjusting clothes means modifying garments to fit your body better through hemming, taking in seams, adding darts, or using no-sew alternatives like fabric tape and clips. DIY alterations cost under $5 per garment while professional tailoring runs $15-75. Virtual try-on tools like CheckMyFit help you avoid sizing mistakes before you buy.
What Does It Mean to Adjust Clothes?
Adjusting clothes refers to any modification that improves how a garment fits your unique body shape. This includes shortening hems, taking in or letting out seams, adding darts for shape, and fixing waistbands. Clothing alterations range from quick five-minute fixes to complex restructuring that requires professional tailoring skills.
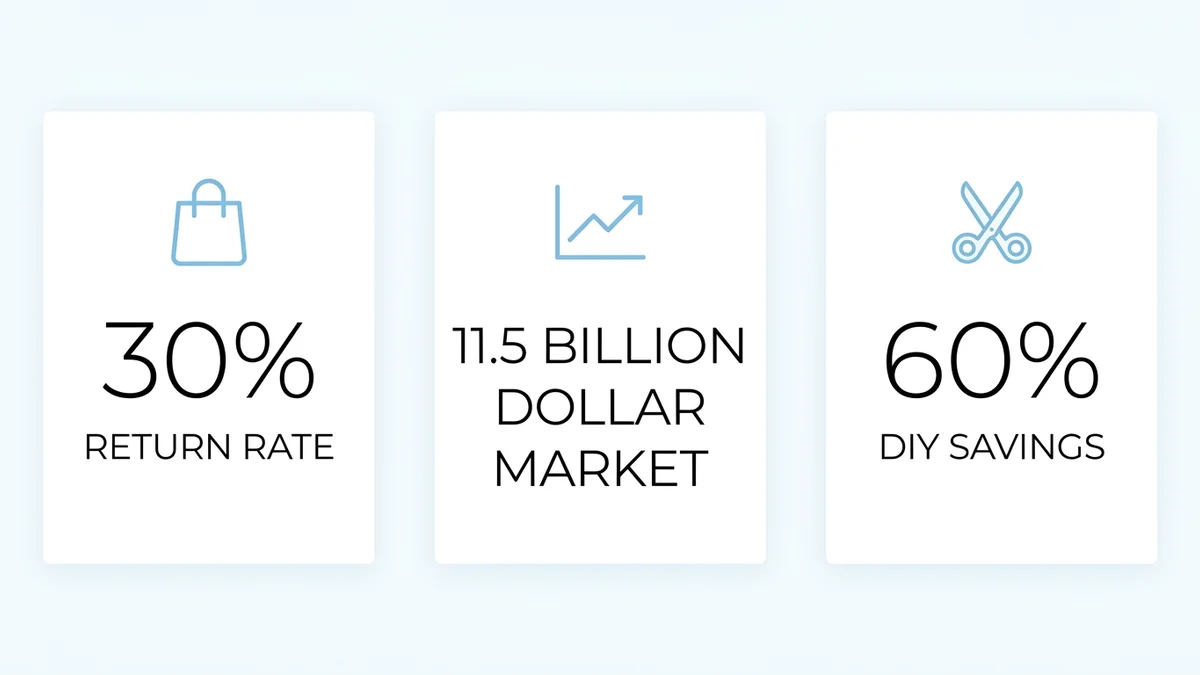
The global tailoring and alteration services market reached $11.5 billion in 2024 and is projected to hit $18.8 billion by 2033, growing at a 6.5% CAGR. This growth reflects a simple truth: mass-produced clothing rarely fits perfectly off the rack.
Around 30% of online clothing purchases are returned due to fit issues, making alterations a practical skill that saves both money and time.
If you struggle with finding the right size, check out our guide on how to find your perfect size when shopping online for tips on measuring yourself accurately.
Key Takeaway: Learning basic clothing adjustments saves you money, reduces returns, and ensures every piece in your wardrobe flatters your body.
How Do You Adjust Clothes That Are Too Big?
Clothes that are too big can be fixed by taking in the side seams, adding darts at the waist or bust, tapering sleeves or pant legs, or using temporary solutions like clips and belts. The right method depends on the garment type and how much excess fabric needs to be removed.
Here are the most common techniques for oversized garments:
Taking In Side Seams
This is the most versatile alteration. Turn the garment inside out, pin along the side seams to your desired fit, and sew a new seam line. Works on shirts, dresses, pants, and jackets.
Steps:
- Turn the garment inside out and put it on
- Have someone pin along the side seams where you want it tighter
- Remove the garment and mark the pin line with tailor's chalk
- Sew along the chalk line with a straight stitch
- Try it on before cutting excess fabric
- Trim the seam allowance to 1/2 inch and finish the raw edge
Adding Darts
Darts are wedge-shaped folds sewn into fabric to create shape. They work especially well on tops and dresses that are loose at the waist but fit at the shoulders.
Tapering Sleeves and Pant Legs
Pin the sleeve or leg to your desired width, tapering gradually from the existing seam to the cuff. Sew along the pinned line and trim excess.
| Garment Area | Best Adjustment Method | Difficulty Level |
|---|---|---|
| Waist | Take in side seams or add darts | Easy |
| Shoulders | Move shoulder seam inward | Advanced |
| Sleeves | Taper from armhole to cuff | Moderate |
| Pant legs | Taper from thigh to ankle | Easy |
| Chest/bust | Add bust darts | Moderate |
| Hem length | Shorten with hemming | Easy |
Key Takeaway: Always pin and try on before cutting. You can always take more fabric in, but you can't add it back.
How Can You Alter Clothes Without Sewing?
You can alter clothes without sewing using fabric tape, safety pins, shirt clips, strategic tucking, belts, and even the dryer. These no-sew methods provide quick fixes that work especially well for temporary adjustments or when you don't own a sewing machine.
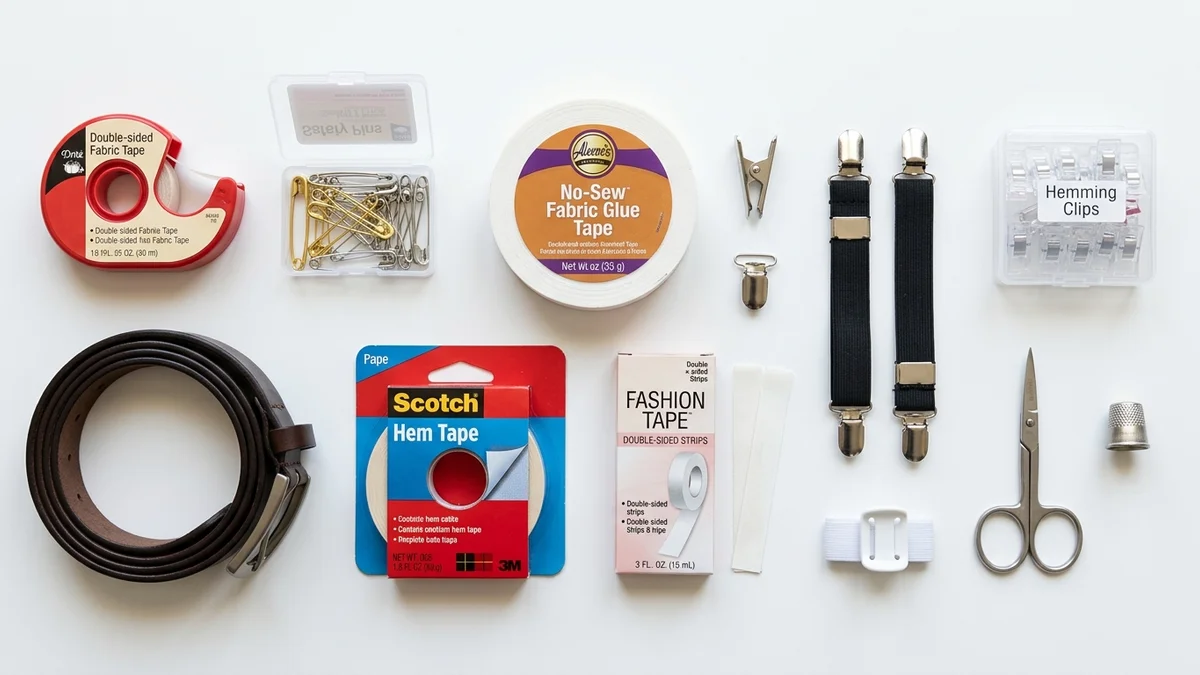
No-Sew Solutions That Actually Work
| Method | Best For | Durability | Cost |
|---|---|---|---|
| Hem tape (fusible web) | Shortening pants, skirts, dresses | Permanent (survives washing) | $3-8 |
| Fashion tape | Securing necklines, temporary tucks | Single use | $5-10 |
| Safety pins | Quick waist/back adjustments | Temporary | $1-3 |
| Shirt clips | Cinching loose shirts from behind | Reusable | $5-12 |
| Belt styling | Oversized dresses, long tops | Permanent styling | $10-30 |
| Military tuck | Excess shirt fabric at waist | Temporary | Free |
| Dryer shrinking | Slightly oversized cotton items | Permanent | Free |
Hem tape is the most reliable no-sew option. Place the adhesive strip between the folded fabric layers and press with a hot iron. The bond is permanent and survives multiple wash cycles.
The military tuck is a quick way to make a loose shirt look fitted. Pinch the excess fabric at each side seam, fold it toward the back, and tuck the fold into your waistband. This creates a clean front line without any tools.
For more creative ways to transform your wardrobe without professional help, see our complete clothing revamp guide.
What Clothing Alterations Can You Do at Home?
Most basic clothing alterations can be done at home with a sewing machine and basic supplies. Hemming, taking in seams, replacing buttons, adding elastic, and tapering legs or sleeves are all beginner-friendly projects. More complex work like restructuring shoulders or altering lined jackets should go to a professional.
Essential Tools for DIY Alterations
Before you start, gather these supplies:
- Sewing machine (even a basic model works)
- Measuring tape (flexible, body-measuring type)
- Tailor's chalk or fabric markers
- Straight pins and pin cushion
- Seam ripper (for removing old stitches)
- Sharp fabric scissors
- Iron and ironing board (pressing is critical)
- Matching thread (always match your fabric color)
Step-by-Step: Hem Pants at Home
- Put on the pants with the shoes you plan to wear
- Fold the fabric under to your desired length
- Pin the fold in place all the way around
- Remove pants and measure the fold is even on both legs
- Press the fold with an iron to create a crease
- Sew a straight stitch 1/4 inch from the folded edge
- Trim excess fabric, leaving a 1-inch seam allowance
Step-by-Step: Take In a Shirt Waist
- Turn the shirt inside out and put it on
- Pinch the excess fabric at each side seam
- Pin along both sides evenly
- Mark the pin line with tailor's chalk
- Sew from the armpit down to the hem on each side
- Try on before trimming
- Finish raw edges with a zigzag stitch
Understanding clothes for your body type helps you know which adjustments will have the biggest impact on your look.
Key Takeaway: Practice on thrift store finds before altering your favorite pieces. A $3 practice shirt is cheaper than a ruined blouse.
DIY vs Professional Alterations: Cost Comparison
Knowing when to DIY and when to hire a tailor saves both money and heartache. Here is a realistic cost breakdown:
| Alteration Type | DIY Cost | Professional Cost | DIY Difficulty |
|---|---|---|---|
| Hem pants | $0-2 | $10-25 | Easy |
| Hem dress/skirt | $0-2 | $12-30 | Easy |
| Take in waist | $0-3 | $15-35 | Moderate |
| Add darts | $0-2 | $15-25 | Moderate |
| Taper pant legs | $0-2 | $15-30 | Easy |
| Shorten sleeves | $0-2 | $15-25 | Moderate |
| Adjust shoulders | Not recommended | $25-75 | Advanced |
| Replace zipper | $3-8 | $15-35 | Moderate |
| Reline jacket | $10-20 | $40-100 | Advanced |
When to choose a professional tailor:
- The garment costs more than $100
- It needs shoulder restructuring
- The fabric is delicate (silk, lace, beaded)
- It requires more than three major changes
- It is a formal piece (suit, wedding dress)
The average American spends $120/year on clothing alterations. Learning basic DIY techniques can cut that by 60%.
Common Mistakes When Adjusting Clothes
Avoid these errors that beginners frequently make:
- Cutting before trying on. Always pin, sew, and try on before trimming excess fabric. You cannot undo a cut.
- Ignoring grain lines. Fabric has a natural direction. Pulling it off-grain while pinning creates puckering and twisting after sewing.
- Using the wrong thread. Mismatched thread color makes alterations visible. Bring the garment to the store to match exactly.
- Skipping pressing. Ironing seams flat between steps is what makes DIY alterations look professional. Press every seam before moving on.
- Over-altering. Taking in too much creates pulling and discomfort. Aim for a fit that allows comfortable movement, not skin-tight.
- Not washing first. Fabrics shrink after the first wash. Always launder the garment before altering it so your adjustments stay accurate.
How CheckMyFit Helps You Skip Alterations Entirely
The smartest alteration is the one you never need. Virtual try-on technology lets you see exactly how clothes will look on your body before purchasing. This means fewer sizing surprises and fewer trips to the tailor.
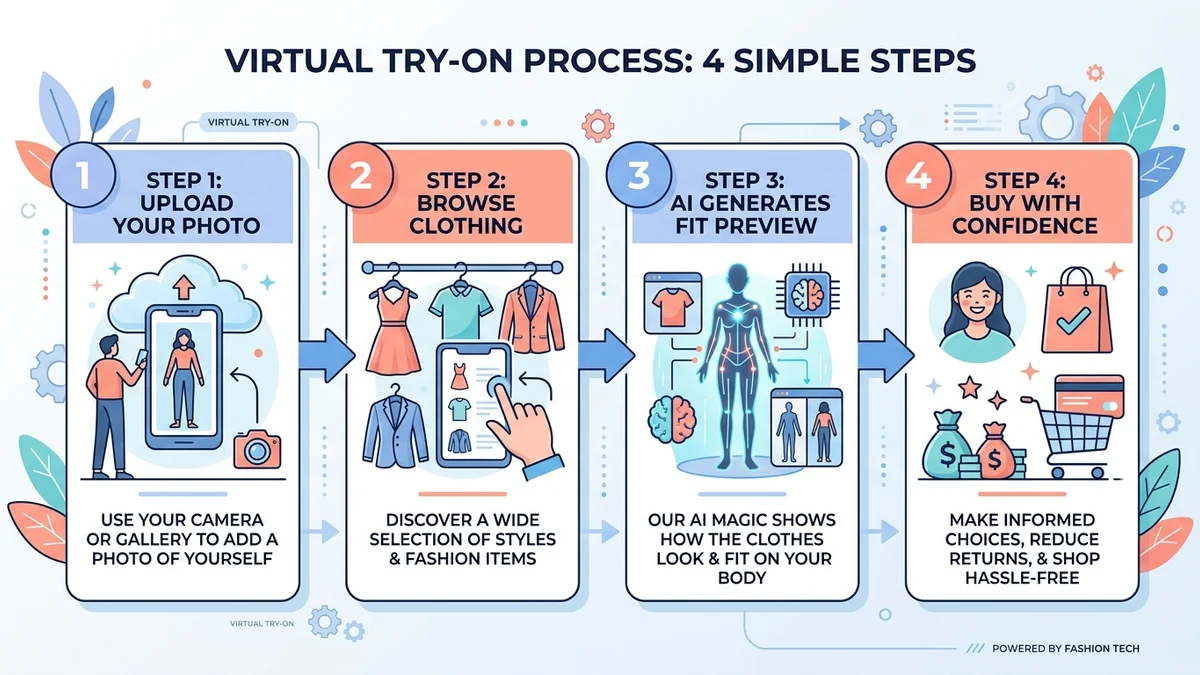
CheckMyFit uses AI to overlay clothing onto your photo, showing you the real fit, drape, and proportions. Instead of guessing between a medium and a large, you can see both on your actual body shape.
This approach directly tackles the 30% return rate caused by poor online fit. When you can visualize the fit before buying, you are far more likely to get clothes that need zero adjustments.
If you are interested in how this technology works, explore our guide on virtual fitting rooms and learn how virtual try-on reduces fashion returns.
Key Takeaway: Combining virtual try-on with basic alteration skills means every piece in your wardrobe fits like it was made for you.
Recommended Products for Clothing Alterations
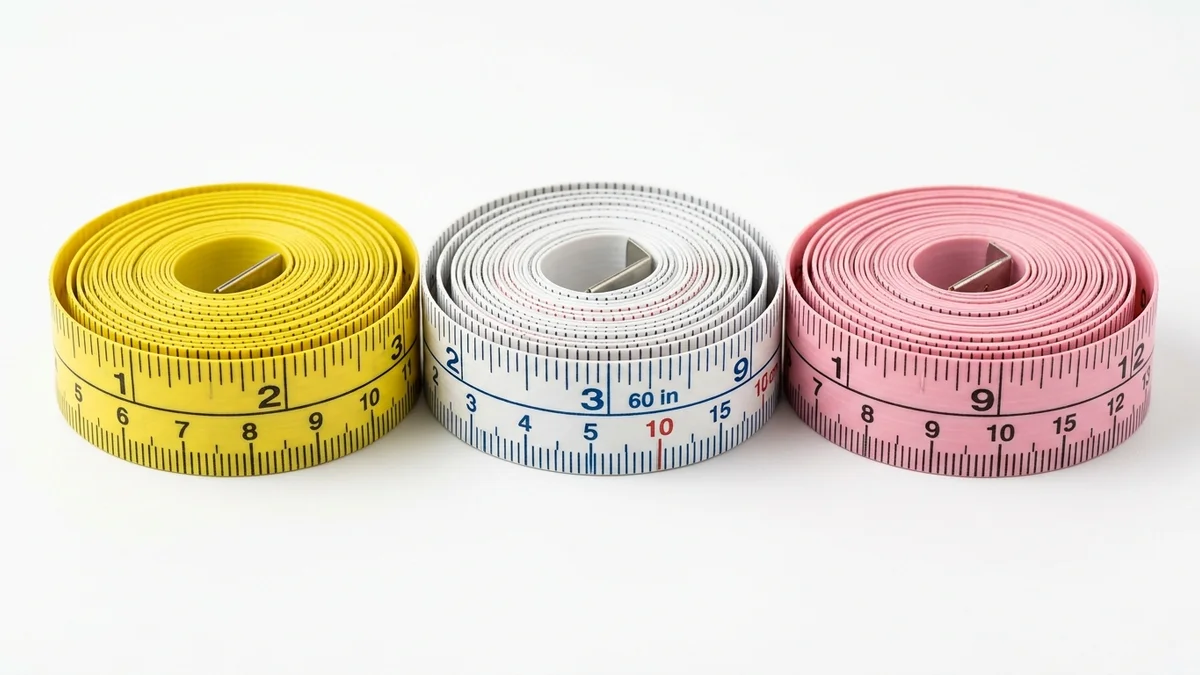
Essential for accurate body and garment measurements before any alteration. Flexible 60-inch tape works for all body sizes.
View on Amazon →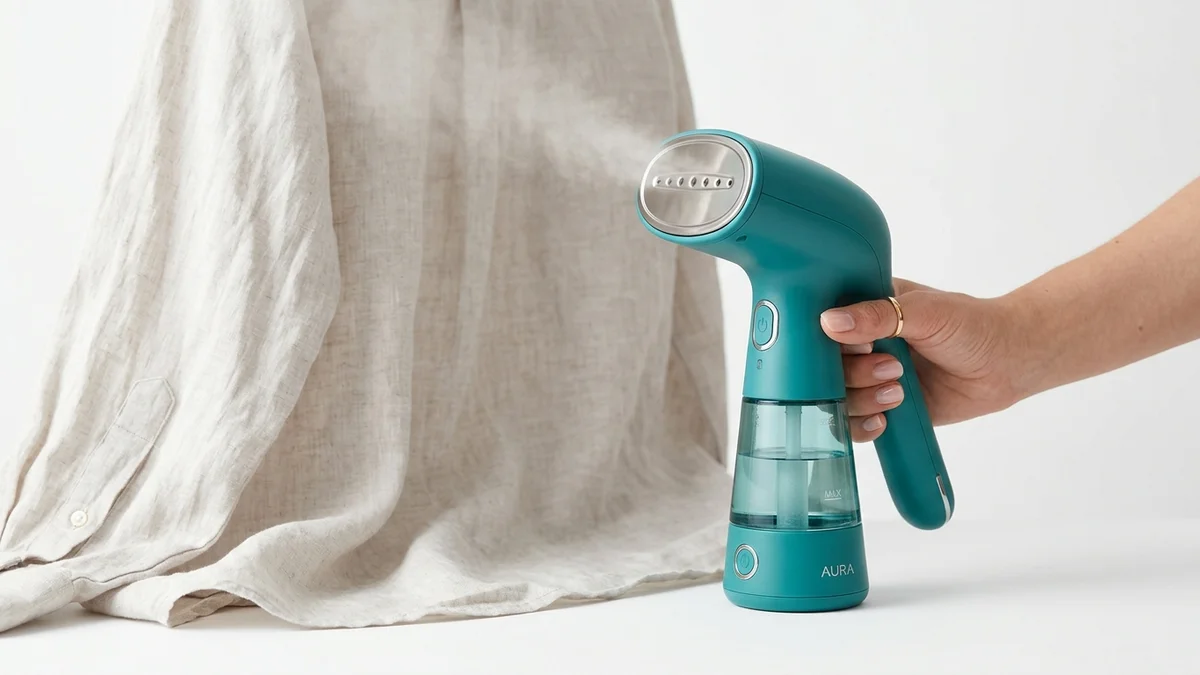
Perfect for pressing seams flat during alterations. Heats in 60 seconds and works on all fabric types without risk of scorching.
View on Amazon →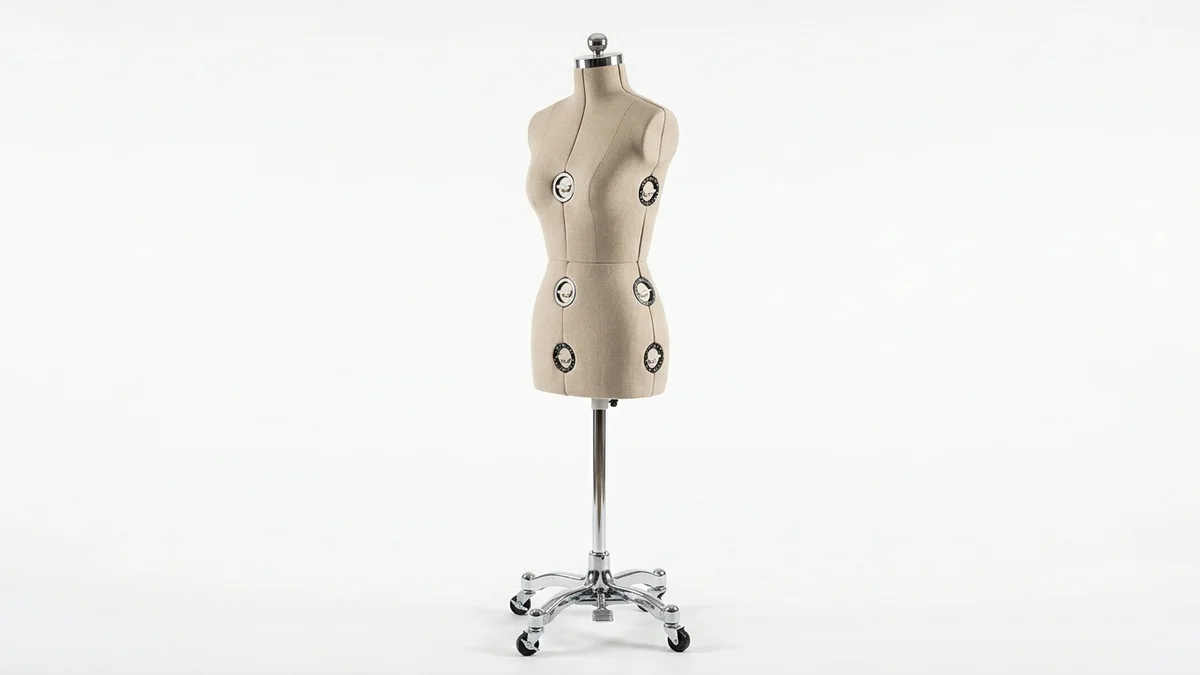
Adjusts to match your exact measurements for precise fitting and pinning. Makes solo alterations possible without a helper.
View on Amazon →Frequently Asked Questions
How much does it cost to get clothes altered?
Professional clothing alterations typically cost between $10 and $75 per garment depending on complexity. Simple hems run $10-25, while shoulder restructuring can reach $75. DIY alterations cost virtually nothing beyond a one-time investment in basic tools like a sewing machine, pins, and tailor's chalk.
What tools do you need for clothing alterations?
Essential alteration tools include a sewing machine, flexible measuring tape, tailor's chalk, straight pins, a seam ripper, sharp fabric scissors, matching thread, and an iron. For no-sew fixes, you need hem tape, fashion tape, safety pins, and shirt clips. A dress form is helpful but not required.
Can a tailor make clothes smaller?
Yes, a tailor can make most garments smaller by taking in side seams, adding darts, tapering legs or sleeves, and adjusting waistbands. The general limit is about four inches of reduction for tops and two inches for pants. Beyond that, the garment proportions distort and the alteration becomes impractical.
What can and can't a tailor fix?
A tailor can fix hemming, waist adjustments, sleeve length, tapering, dart additions, zipper replacements, and button spacing. A tailor typically cannot fix garments that need more than four inches of resizing, printed pattern realignment, major shoulder restructuring on casual garments, or alterations that would cost more than the garment itself.
Is it cheaper to alter clothes or buy new ones?
Altering clothes is almost always cheaper when the garment cost more than $30. A $15-25 hem alteration on a $60 pair of pants is worthwhile. However, if a garment needs three or more major changes totaling over $50, buying a better-fitting replacement is usually more cost-effective.
What is the easiest clothing alteration?
Hemming pants or a skirt is the easiest clothing alteration. It requires only folding fabric to the desired length, pinning it, and sewing a straight line. Even complete beginners can achieve a clean hem in under 30 minutes. No-sew hem tape makes it even simpler for those without a sewing machine.
What is the difference between alterations and tailoring?
Alterations are minor modifications to existing garments, such as hemming, taking in seams, or adjusting waistbands. Tailoring involves more extensive custom fitting or creating garments from scratch to match exact body measurements. Alterations fix fit issues; tailoring builds or rebuilds the garment's structure entirely.
Can all types of clothes be altered?
Most clothes can be altered, but some are more difficult than others. Structured garments like suits and lined jackets require professional skills. Heavily beaded, sequined, or pleated fabrics limit what changes are possible. Knit fabrics stretch and shift, making precise alterations challenging without specialized equipment.
Conclusion
Learning how to adjust clothes is one of the most practical fashion skills you can develop. Whether you choose no-sew quick fixes or invest in a sewing machine for DIY tailoring, every alteration you master means a better-fitting wardrobe. Combine these skills with virtual try-on technology from CheckMyFit to minimize sizing mistakes from the start. Upload your photo, try clothes on virtually, and only buy what you know will fit. The result is a wardrobe where every piece looks like it was made just for you.