Great pictures of clothes can make or break an online sale. Whether you're selling on eBay, running an ecommerce store, or just want to virtually try on outfits, understanding clothing photography matters.
This guide covers everything about pictures of clothes—from taking professional product photos to using AI technology for virtual try-on. You'll learn the techniques that turn ordinary clothing shots into images that convert browsers into buyers.
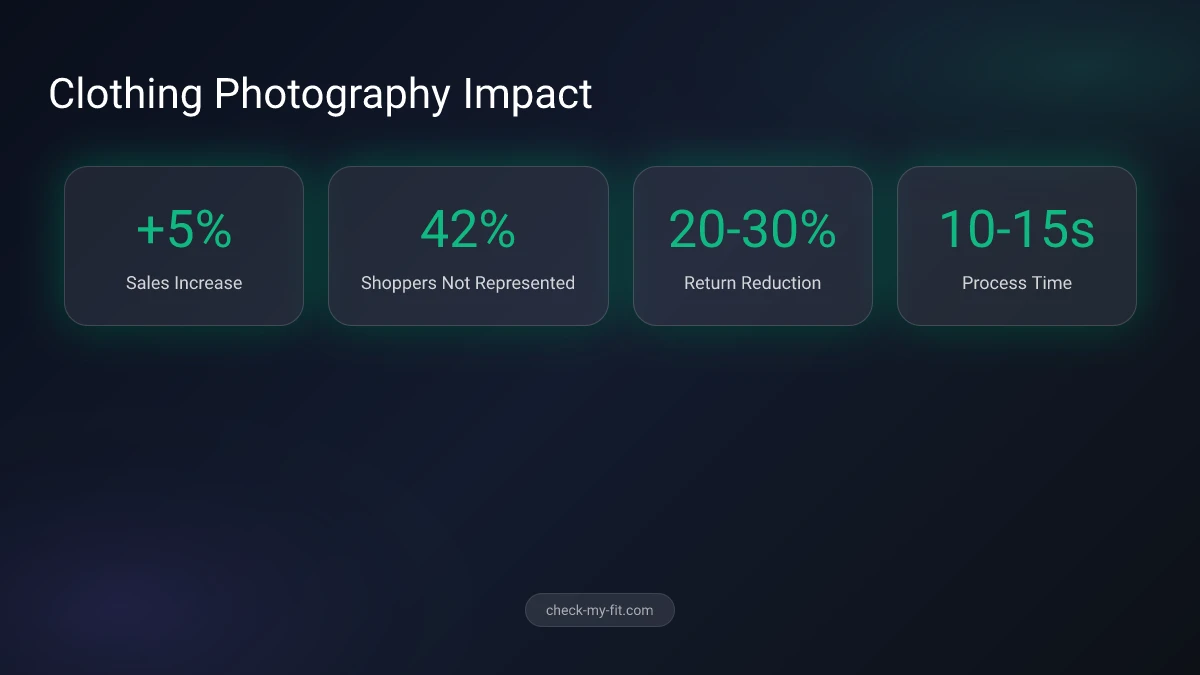
42% of online shoppers don't feel represented by images of models, making personalized clothing photos essential.
What Makes Great Pictures of Clothes?
Great pictures of clothes clearly show the garment's color, texture, fit, and details while making viewers imagine themselves wearing it. The best clothing photos combine proper lighting, clean backgrounds, and multiple angles to give shoppers a complete understanding of the product.
Professional clothing photography follows these principles:
- Accuracy - Colors match the real garment
- Clarity - Details visible without distortion
- Context - Shows how the item fits and drapes
- Consistency - Uniform style across all products
Key Takeaway: High-quality clothing photos can increase sales by up to 5% compared to average images.
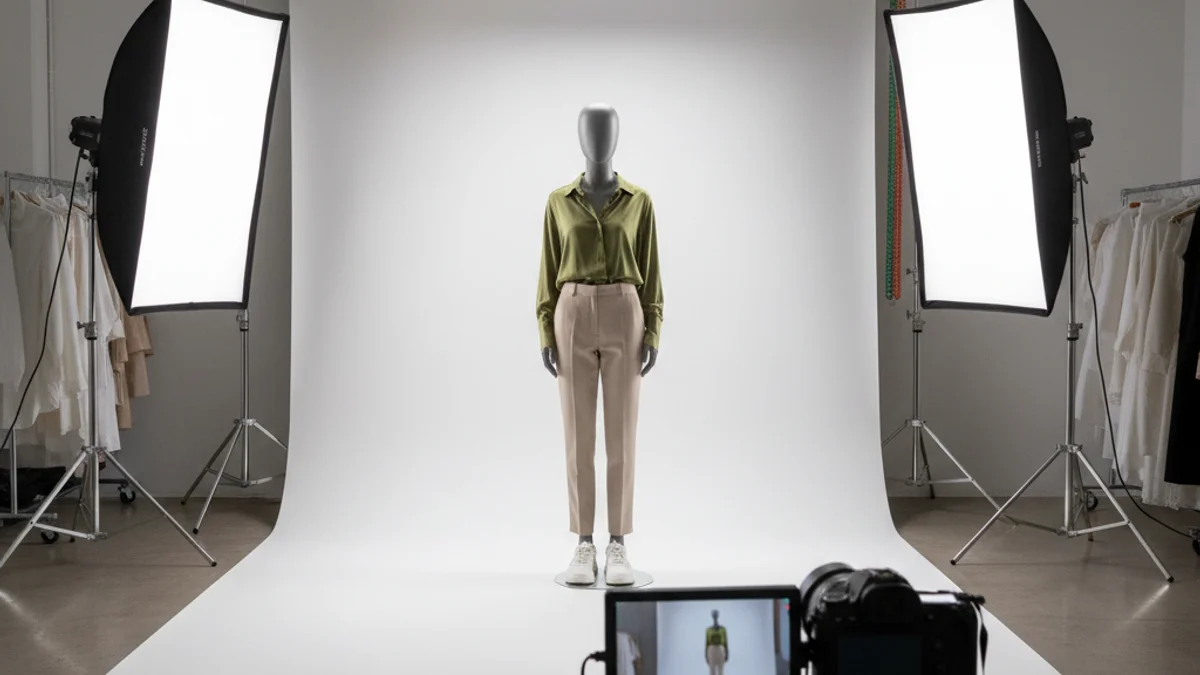
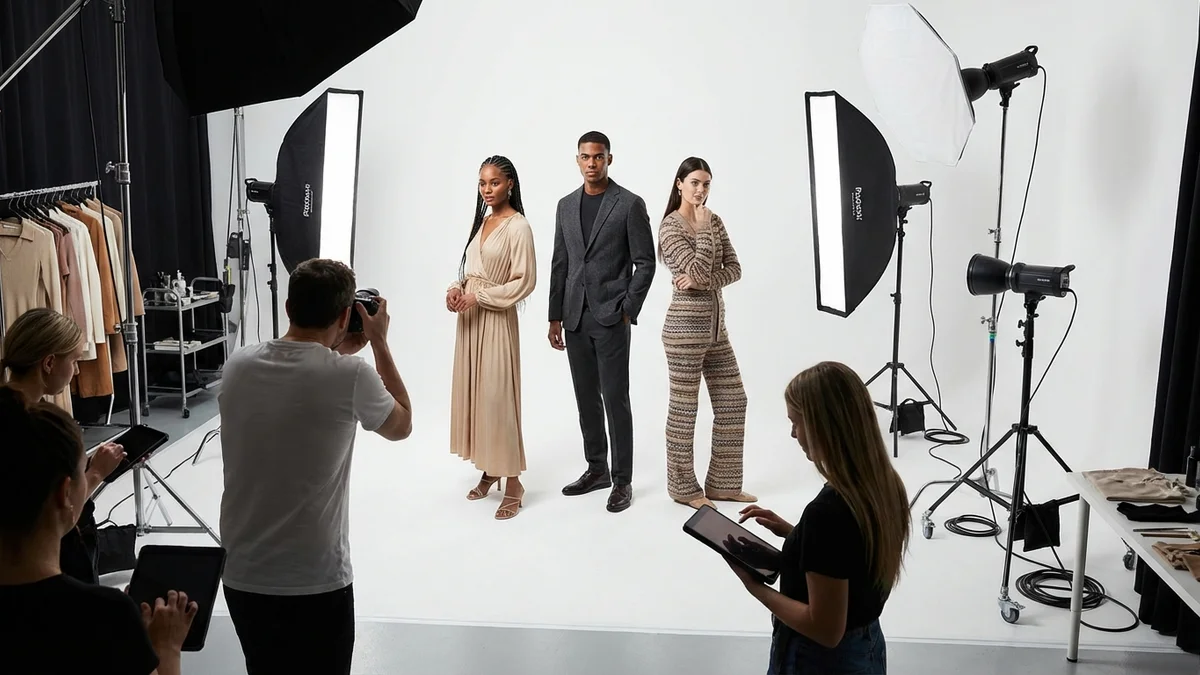
Types of Clothing Photography
| Style | Best For | Pros | Cons |
|---|---|---|---|
| Flat Lay | All clothing, DIY shoots | Easy setup, no models needed | Doesn't show fit |
| Mannequin | Ecommerce catalogs | Shows shape, consistent | Less personality |
| Model | Brand building, lifestyle | Shows fit, creates connection | Higher cost |
| Ghost Mannequin | Professional stores | Clean look, shows inside | Requires editing |
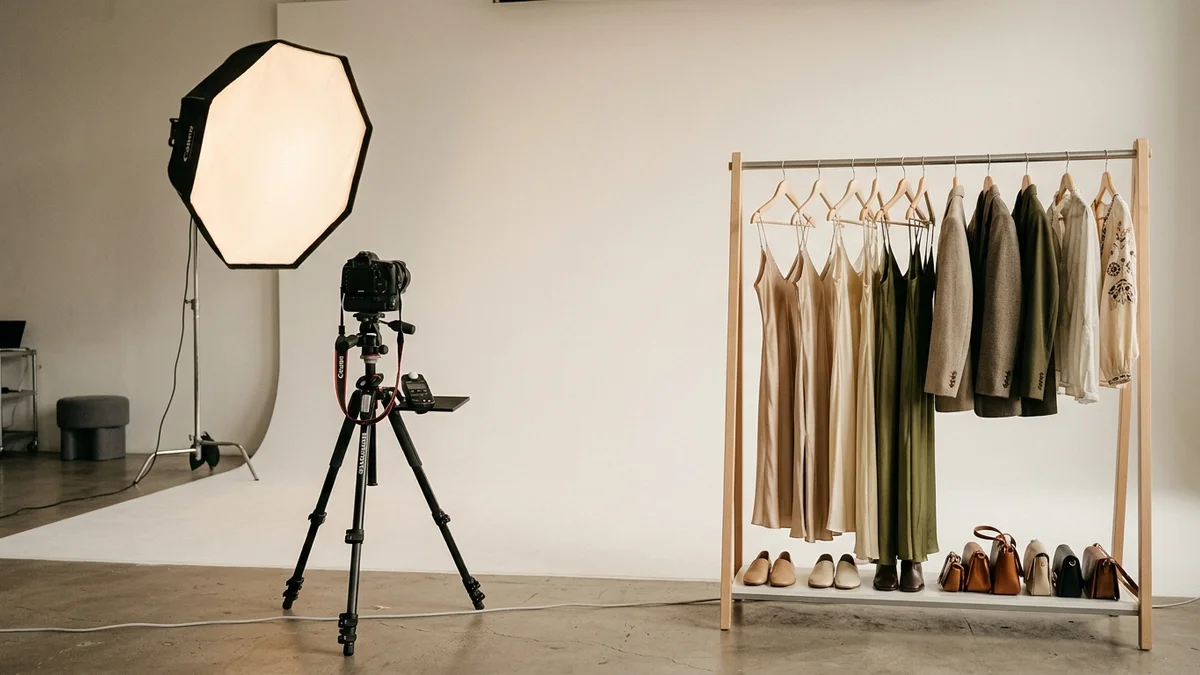
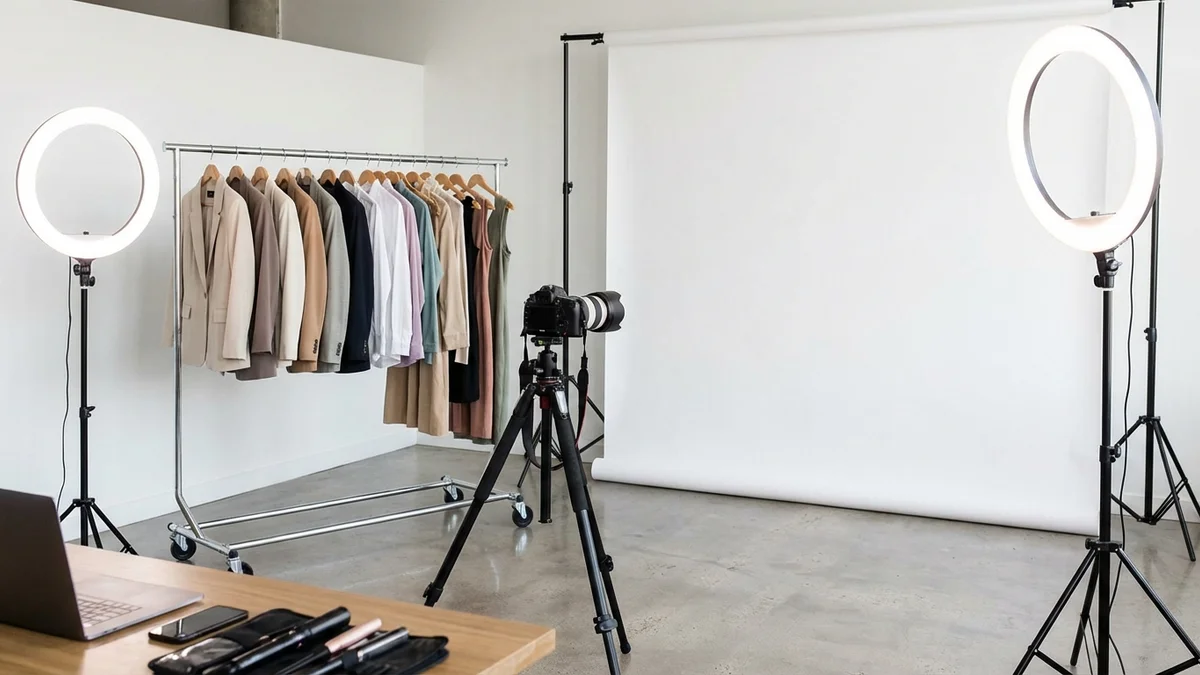
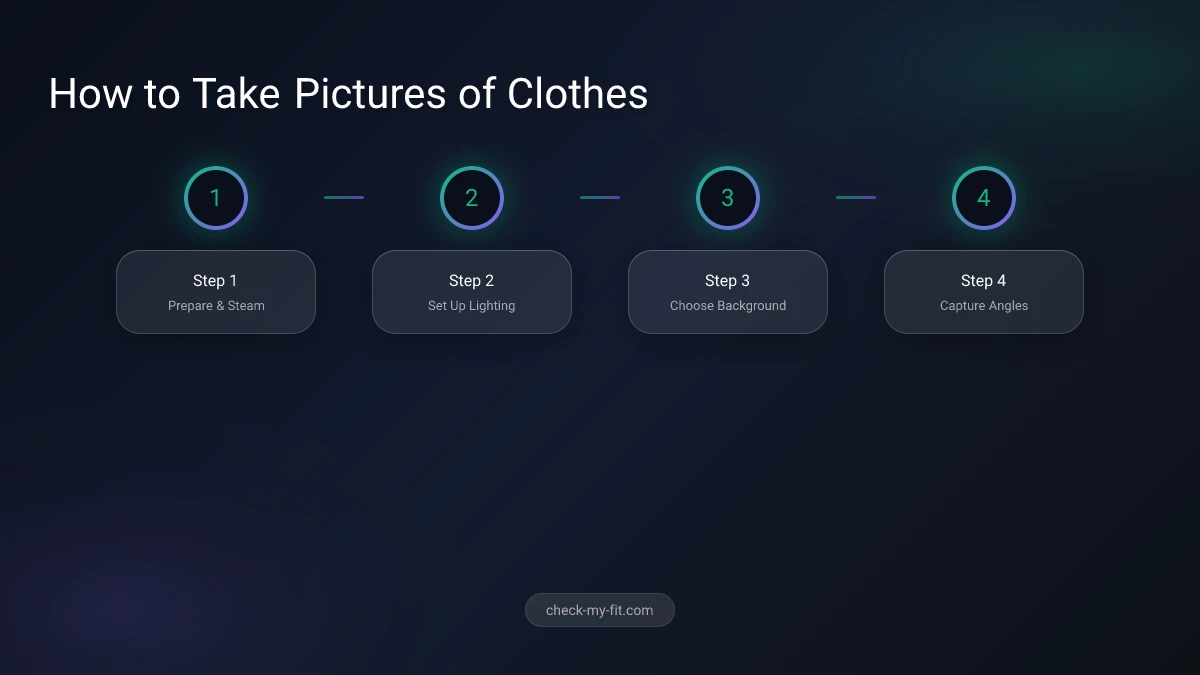
How to Take Good Pictures of Clothes
Taking good pictures of clothes requires attention to three key elements: lighting, background, and presentation. Even with a smartphone, you can capture professional-looking clothing photos by following these steps.
Step 1: Prepare Your Clothing
Before photographing any garment:
- Steam or iron to remove all wrinkles
- Remove tags and loose threads
- Check for stains or damage
- Close zippers and button all buttons
- Smooth fabric for a polished look
Step 2: Set Up Your Lighting
Natural light produces the best clothing photos. Position your setup near a large window during daylight hours. Avoid direct sunlight, which creates harsh shadows.
For indoor shoots without natural light:
- Use softbox lights or ring lights
- Position lights at 45-degree angles
- Add reflectors to fill shadow areas
- Keep lighting consistent across all shots
Step 3: Choose Your Background
A clean, neutral background lets clothing stand out:
- White backgrounds - Standard for ecommerce
- Gray backgrounds - Professional, reduces glare
- Textured surfaces - Add visual interest for lifestyle shots
DIY option: Tape white poster board to a wall for an instant photo studio.
Step 4: Capture Multiple Angles
Include these shots for every garment:
- Full front view
- Full back view
- Side profile
- Close-up of fabric texture
- Detail shots (buttons, stitching, labels)
- Inside view (especially for jackets/coats)
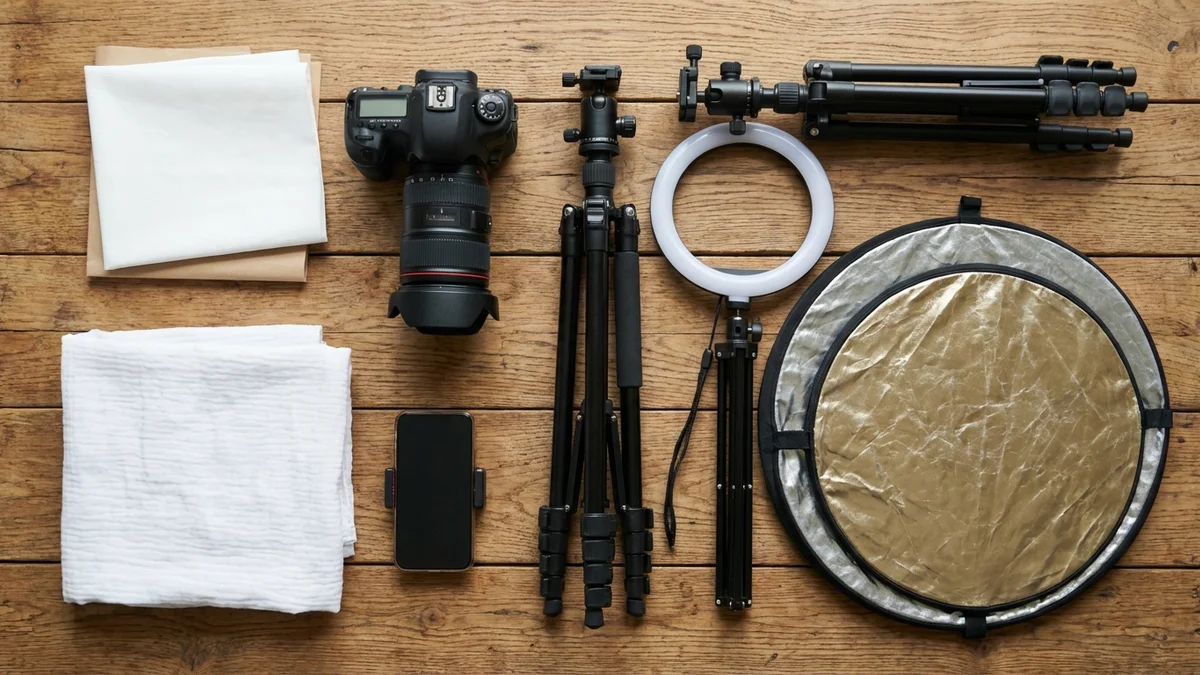
What Equipment Do I Need for Clothing Photography?
You don't need expensive gear to take quality pictures of clothes. A smartphone with good lighting can produce professional results. However, certain equipment makes the process easier and more consistent.
Essential Equipment
| Item | Purpose | Budget Option | Professional Option |
|---|---|---|---|
| Camera | Capture images | Smartphone | DSLR/Mirrorless |
| Tripod | Steady shots | Phone tripod | Professional tripod |
| Lighting | Even illumination | Window light | Softbox kit |
| Background | Clean backdrop | White poster | Seamless paper |
| Reflector | Fill shadows | White foam board | Professional reflector |
Camera Settings for Clothing
If using a DSLR or mirrorless camera:
- ISO: 400-800 (higher for artificial light)
- Aperture: f/8-f/11 for sharp details
- White balance: Match your lighting source
- Focus: Manual for consistent results
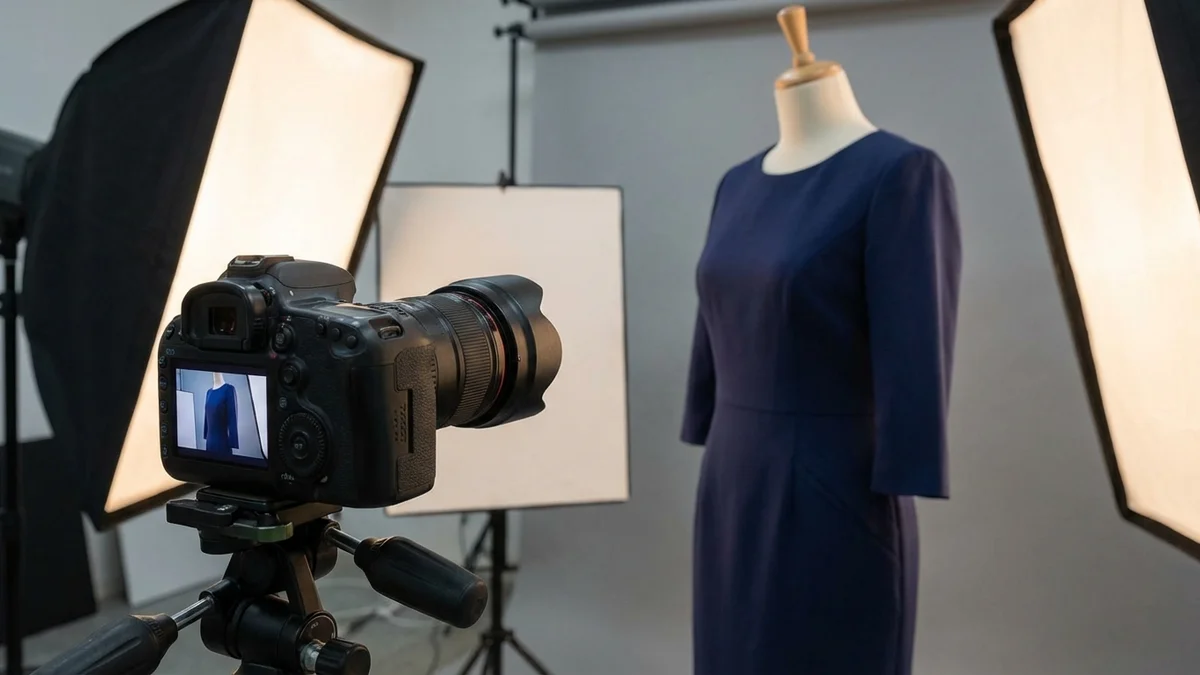
Should I Use Models or Mannequins for Clothes?
The choice between models and mannequins depends on your budget, brand image, and target audience. Each approach has distinct advantages for different situations.
Use Models When:
- Building a lifestyle brand
- Showing how clothes fit and move
- Creating emotional connections
- Targeting specific demographics
Use Mannequins When:
- Shooting high volumes quickly
- Maintaining consistency across catalogs
- Working with limited budgets
- Selling on platforms like Amazon or eBay
Use Flat Lay When:
- Shooting accessories or basics
- Creating DIY content
- Showcasing patterns and details
- Building social media content
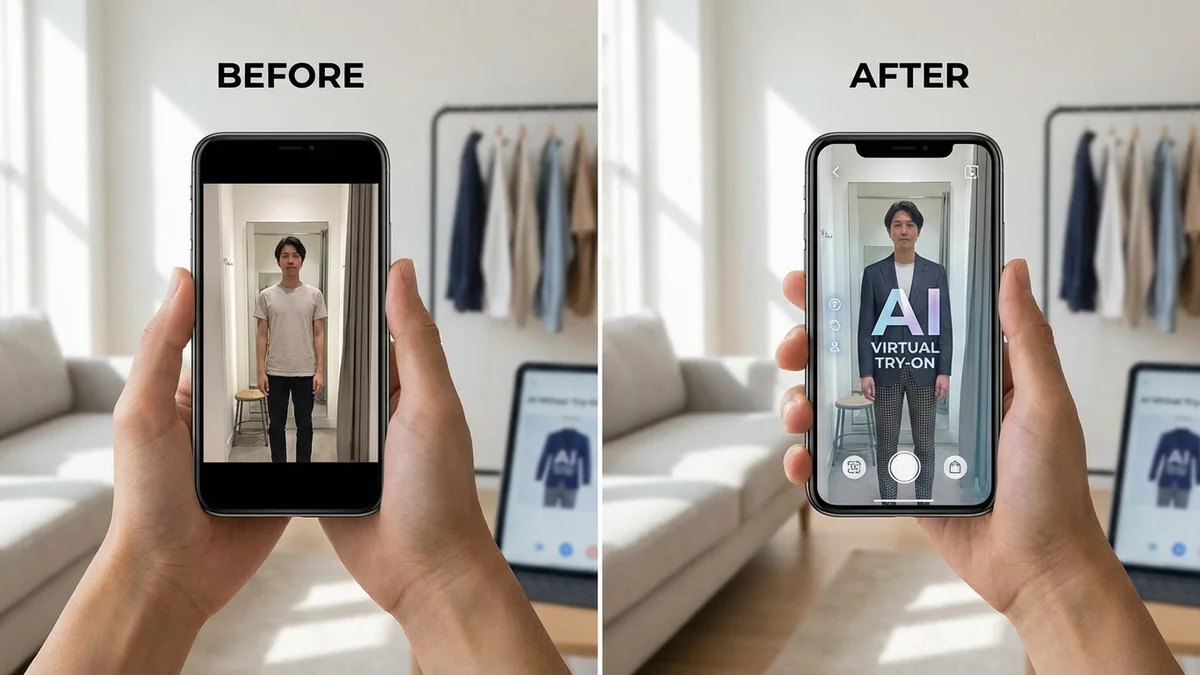
How to Use AI for Clothing Photos
AI technology has revolutionized how we create and interact with pictures of clothes. From generating model photos to virtual try-on, AI tools save time and expand creative possibilities.
Virtual Try-On with AI
CheckMyFit and similar tools let you virtually try on clothes using your own photos. This technology helps both sellers and shoppers:
For Sellers:
- Create diverse model photos without expensive shoots
- Show clothing on different body types
- Generate marketing content quickly
For Shoppers:
- See how clothes look before buying
- Reduce returns from fit issues
- Experiment with styles risk-free
How AI Virtual Try-On Works
- Upload a photo of yourself (or a model)
- Select the clothing item to try
- AI maps the garment to the body
- Receive a realistic preview in seconds
Tools like CheckMyFit capture fabric textures and natural draping, so results look authentic rather than digitally pasted.
Virtual try-on technology has reduced return rates by 20-30% for retailers who implement it effectively.
Recommended Products for Clothing Photography
Set up your clothing photography studio with these essential tools:
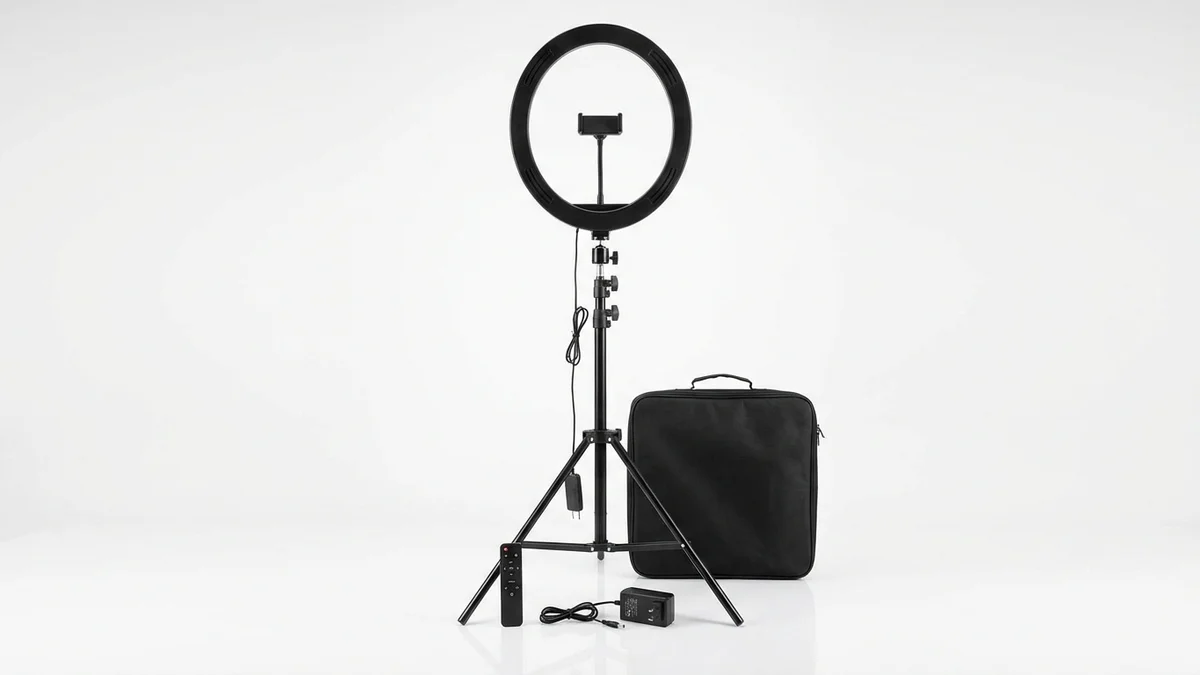
Professional ring light with adjustable brightness. Perfect for even, shadow-free clothing photography indoors.
View on Amazon →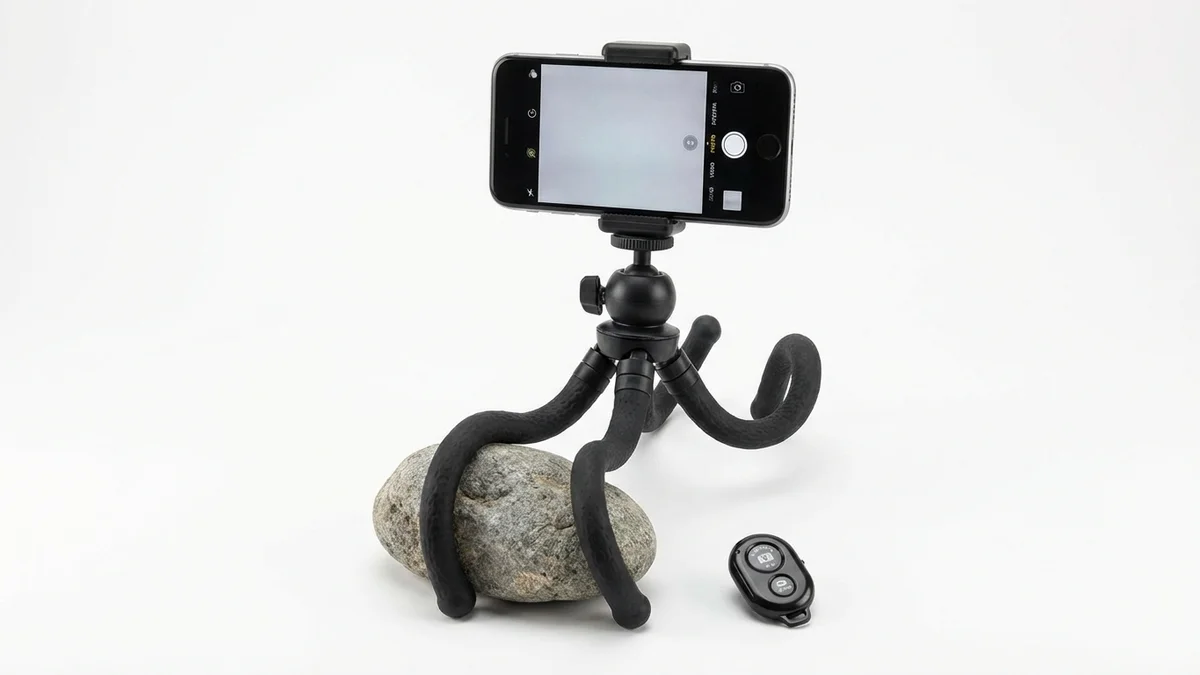
Flexible tripod for smartphones and cameras. The Bluetooth remote enables hands-free shooting for consistent angles.
View on Amazon →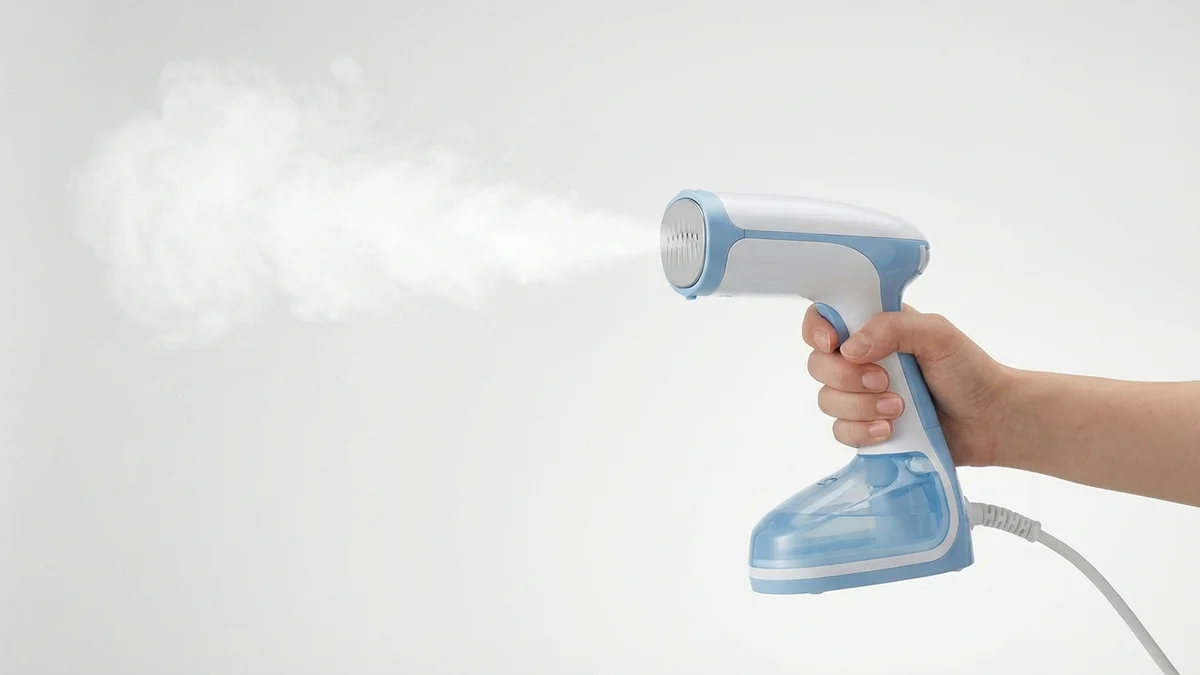
Remove wrinkles quickly before shooting. Wrinkle-free garments photograph better and look more professional.
View on Amazon →Tips for Selling Clothes Online with Photos
Your pictures of clothes directly impact sales. Follow these platform-specific tips for better results:
For eBay:
- Use your own photos (stock photos only for new items)
- Include 12 images maximum per listing
- Show any flaws or wear honestly
- Photograph tags and labels
For Poshmark/Depop:
- Lead with lifestyle or styled shots
- Show items worn when possible
- Include flat lay for details
- Maintain consistent editing style
For Ecommerce Stores:
- Use white backgrounds for catalogs
- Include zoom functionality
- Show all color variations
- Add 360-degree views if possible
Frequently Asked Questions
What background works best for pictures of clothes?
White or neutral gray backgrounds work best for most clothing photography. They keep focus on the garment, ensure accurate color representation, and work across all platforms. For lifestyle content, textured backgrounds or real-world settings add personality.
What lighting is best for clothing photography?
Natural light from a large window produces the best clothing photos. Position garments near the window, avoiding direct sunlight that creates harsh shadows. For indoor shoots without natural light, use softbox lights positioned at 45-degree angles.
How do I photograph clothes for selling online?
Prepare garments by steaming and removing tags. Use a clean background and even lighting. Capture multiple angles: front, back, sides, and details. Include close-ups of fabric texture, labels, and any unique features. Keep editing minimal and accurate.
What angles work best for clothing photos?
Essential angles include straight-on front and back views, side profiles, and 45-degree angles showing depth. Add close-up shots of fabric, buttons, stitching, and labels. For jackets and coats, include inside views showing lining and pockets.
How do I edit clothing photos?
Keep editing minimal to maintain accuracy. Adjust brightness and contrast for clarity. Color correct to match the actual garment. Remove background distractions. Avoid filters that distort colors—customers expect the item to match what they see.
Can I use AI to try on clothes in photos?
Yes, AI virtual try-on tools like CheckMyFit let you see how clothes look on your body before buying. Upload your photo, select a garment, and receive a realistic preview in seconds. This technology helps reduce returns by showing accurate fit.
How many photos should I take of each clothing item?
Take at least 5-8 photos per garment: front, back, sides, and 2-3 detail shots. For selling online, more photos increase buyer confidence. Include shots of tags, fabric close-ups, and any unique features or flaws.
Do I need a professional camera for clothing photos?
No, modern smartphones produce excellent clothing photos with proper lighting. Focus on lighting quality, clean backgrounds, and steady shots using a tripod. Professional cameras offer more control but aren't essential for good results.
Create Better Pictures of Clothes Today
Quality pictures of clothes open doors—whether you're selling online or shopping virtually. The right combination of lighting, angles, and presentation transforms ordinary shots into images that convert.
Want to see how clothes look on you? Try CheckMyFit to virtually try on any outfit. Upload your photo and preview styles before buying—no photography skills required.
Your perfect outfit is just a picture away.